
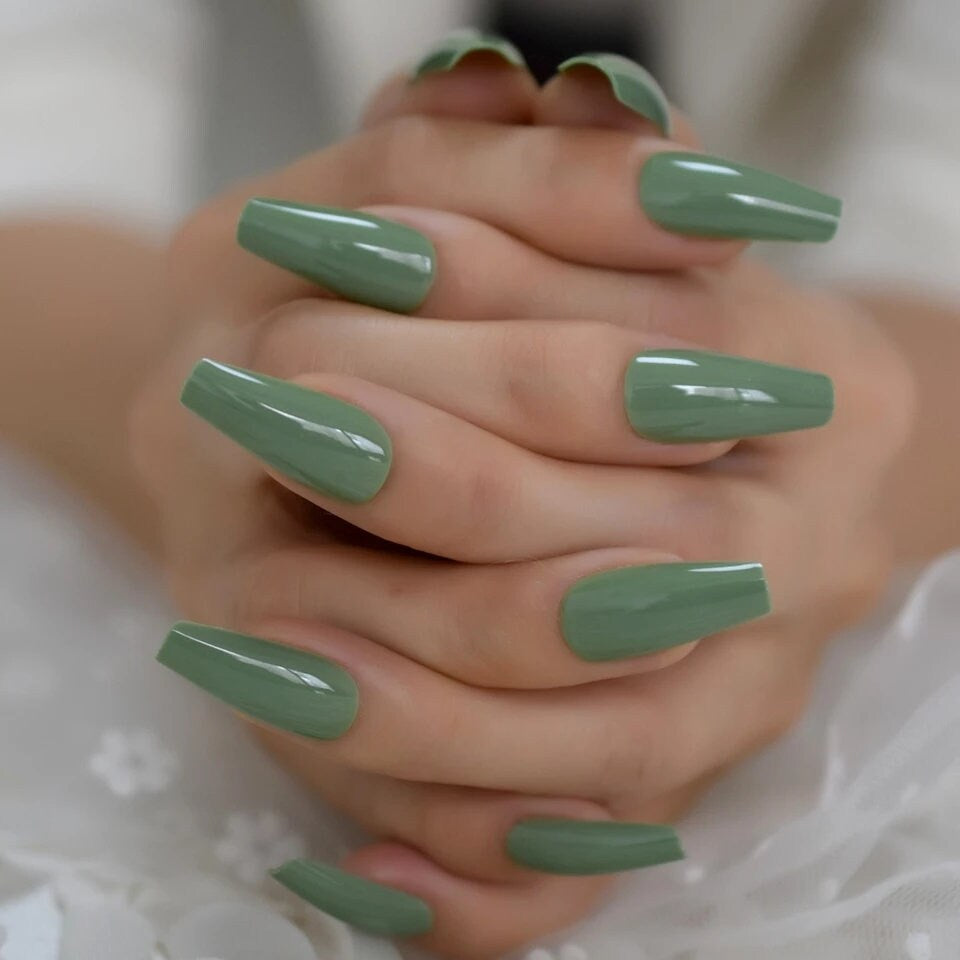


Long Coffin Press On Nails: Glossy Army Green Sage Set (24 PCS + Glue)
Long Coffin Press On Nails: Glossy Army Green Sage Set (24 PCS + Glue)
Couldn't load pickup availability
Long Coffin Press On Nails: Glossy Army Green Sage Set (24 PCS + Glue).
The Perfect Long Coffin Press On Nails DIY Kit
Looking for the best Long Coffin Press On Nails kit? You found it! And here’s the best part: you get FREE 3-5 day shipping on orders $10+ so you can start wearing this incredible Glossy Army Green Sage set right away.
This kit literally includes everything you need for a stunning manicure: 24 nails (sizes 0-9), a file, quality glue, AND sticky pads! (To open the glue, just pierce the center tip with a pin or snip it with scissors.)
These particular Long Coffin Press On Nails are incredibly affordable, totally trendy, and honestly—so easy to wear. This whole DIY trend has been popular for decades now, and for good reason! Switching to this set can seriously help you cut back on your salon spending. Lots of people who switch to press-ons don’t even step foot in a nail salon for months! Yet, with this amazing glam finish, everyone will think you spent a fortune on your manicure. Best of all? It really doesn't take long to master the application!
The Top Benefits of Choosing Long Coffin Press On Nails
Absolutely! Long Coffin Press On Nails offer a ton of benefits over traditional acrylic nails—which is why they're getting more popular every day.
-
Super Affordable: A set is incredibly budget-friendly compared to a salon visit.
-
Time Saver: Once you’ve gotten the hang of it, you only need a few minutes to prep your natural nails and apply your new set of Long Coffin Press On Nails.
-
Less Damaging: Removal is far easier with press-ons versus acrylics, making them less harmful to your nail beds!
-
Total Variety: The combination of low cost and endless variety means you can easily show off multiple trending nail designs in a short period.
Steps on How to Apply Your Long Coffin Press-On Nails
Remember: the healthier your natural nails are, the longer your press-ons will last! We’ve included everything you’ll need in the kit: the nails, glue, file, and buffer.
-
First, Find Your Match: Take the false nails out of the set and size them up against your fingers to find the perfect fit for each nail. Line them up neatly in front of you so you can easily tell which one goes on which finger.
-
Prep the Falsies: If a press-on nail doesn't perfectly fit your finger, no big deal! Just use the included buffer and file to gently shape it. You can also use the buffer to adjust the length if you want a slightly shorter look.
-
Prep Your Natural Nails: Time to clean up! Wash your hands thoroughly and dry them completely. Make sure you get rid of any old polish residue. Use a metal pusher to push back your cuticles, and then clip any overhangs with the nipper.
-
Buff the Surface: Most tutorials—and we agree!—will tell you to buff the surface of your natural nail lightly. This creates a slightly coarse surface that helps the artificial nail adhere much better.
-
Apply Glue & Press Down: Finally, make sure you apply the glue to both the false nail and your finger. Once you place the falsie on your fingernail, press it down firmly for 30 seconds to a full minute so that it sticks properly. It's always smart to start with the pinky finger and work your way up to the thumb!
To Remove: Soak your hands in warm soapy water for about 10 minutes (or until the glue weakens) and then gently pry them off. Tip: Adding acetone to the water can help dissolve the glue faster.
Quick Note: Buyers are responsible for providing the correct shipping address at the time of payment.
Share
5.0 / 5.0
(1) 1 total reviews


